Posts

Showing posts from November, 2014

Just a few more.........

Image
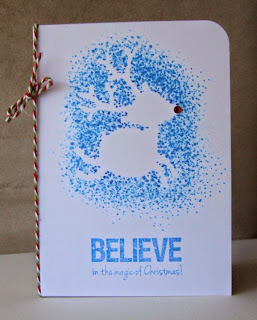
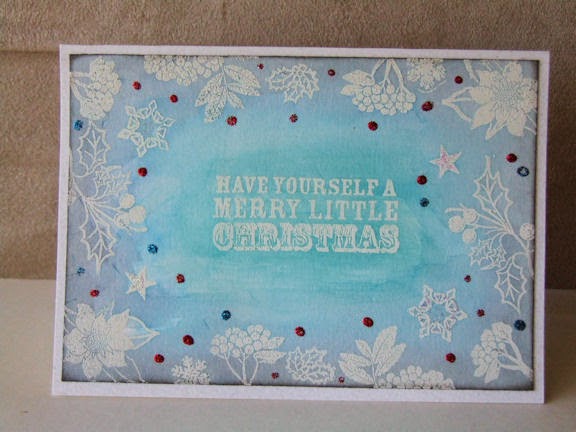
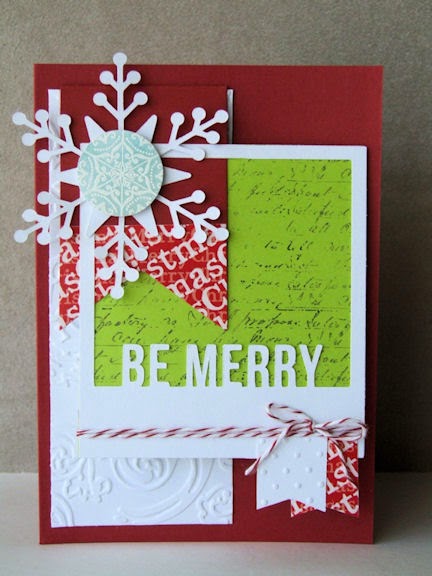
I now have a huge build up of Christmas cards for the year so I'm sure some will hang around till next year or go to Combat cards for next year. Another Bo Bunny  free paper pad creation using the free stamps and Spellbinders A2 bracket borderabilities dies Back to some more from the Online Holiday card workshop and this is a duplicate design of Shari Carroll's  inspired card from Day 1. I cut the frame the same time I cut the frame for the first card I made so of course I had to put it to good use before it got lost in my stash.  On day 5 Yana Smakula showed us how to create 3 different levels of the same design of tag for gifts and then to incorporate them onto a card. Here are my three tags: single layer, double layer then double layer with shaker of beads and sequins.  Below they are incorporated into cards using papers from the North Pole Kaisercraft collection and collectables. There are some die-cut snowflakes from the December 25th Cricut cartri

Day 4 single layer card

Image
Julie Ebersole showed us an alternative use for a die-cut in using it as a mask for a single layer design. I must admit this is probably the third die-cut I used as I was not happy with the other designs as they did not seem to "pop" so well. I stuck with the reindeer theme eventually using a die-cut from the Christmas Cheer Cricut cartridge with a little red rhinestone to finish off his nose. Greeting is from a Kaisercraft set - Christmas quotes. The next pair are a couple of very simple designs to assist a lady at a local Church craft group to get a start on her Christmas cards. Nativity stamp is from a purchase years ago back in early 2000's when I first started stamping and has no brand on it so I can't remember where it was from. The verses are from The Stamps of Life - Christmas4him The last one for the day is another card from scraps of the Bo Bunny freebie papers and the stamp from the Bo Bunny free set also. Merry is the Stampin' Up thinlit.

Day 4 one layer with Laura Bassen

Image
I love one layer cards like this, Laura Bassen masked off a rectangle in the centre of her card and created a scene with the stencils that she had but not having any such stencils, I went with stamping an image with a Kaisercraft stamp from the Twig and berry collection. Hadn't really used this set much but am finding some uses for it amongst this class. Greeting is also from Kaisercraft. Love the result. Come back again soon......

Day 4 - One layer cards

Image
Back to Jennifer McGuire teaching us a one layer window card using partial die-cutting techniques. This would work if I had circle dies or scalloped ones etc. but I don't own those nor do I own any stamp and die sets so the image is stamped and hand cut around to meet up with the circle either side cut with my "go to" Creative Memories circle cutting system.  I was not happy with the way my distress ink blended on the inside of the card though as I had bought a different pack of card bases when I ran out of my usual supply and  so the inks were not working as well on it.   Penguin is a stamp from the Stamps of Life  and the greeting is a freebie from a stamp set with a magazine purchase. Penguin is coloured with coloured pencils using the Gamsol technique. Cute and simple! Back soon with another one layer card............ 

Day 3 - Watercolour card with Jennifer Rzasa

Image
Jennifer Rzasa inspired those of us who are painting challenged to just try watercolour painting a Christmas tree as it is a simple triangular shape. I did okay, I think! I have added silver Kindyglitz and silver liquid pearls to look like it is decorated and topped it off with a little silver sequin star. Banner is a tilted banner die from Simon Says Stamp and the stamp is Kaisercraft North Pole. Thanks for visiting......

Day 3 - Watercolour cards

Image
Kristina Werner started us off today doing a card with an embossed centred greeting surrounded by embossed images and then water coloured the background. My water colours still don't seem to come out too brightly but this was the result of my efforts. I'm happy enough with it and it does look effective as a non dimensional card yet has the texture of the embossed images and glitter glue. Stamps are from a variety of Kaisercraft sets and a few other odd freebie stamps. Thanks for looking, Happy craftin'.........

Day 2 with Jennifer

Image
Day 2 is all about interactive cards and I have to say this is not really up my alley so this is the only one you are likely to see from me as I do not have items in my stash that could work with the other designs unless I come up with a shaker card of some description. This is a Christmas decoration that can be removed from the card front and hung on the tree.  Stamps are from Kaisercraft Twig and Berry clear stamp set and a greeting from part of the recent Stamps of Life set - Ornaments4christmas The Merry is cut on the Silhouette from Marketing Script font.  See you all again soon............

Day 1 with Shari Carroll

Image
This has to be my favourite card from Day 1. I could easily take the time to duplicate this. I stuck with Shari's design which is created to house a gift card beneath the "Be Merry" panel. I didn't have any stencils to use with texture paste like Shari so just dry embossed a piece of white cardstock instead.  Be Merry frame was purchased from the Silhouette store and the Snowflake is a Bird's cards design. Banners are all hand cut as I don't own any dies for those. Stamps are Kaisercraft script and Hot off the Press snowflake. Embossing folders used: Swiss dots and Tim Holtz Regal Flourishes. I love, love, love this card. I would be happy to receive this myself. Thanks for visiting. Happy craftin'............

Day 1 with Debby - take 2

Image
This is the other copy of the card designed by Debby Hughes. I love, love, love this one all because of the colour. Background splashes are Patina Glimmermist and the tag is dipped in Peacock Feathers Distress ink mixed with Perfect Pearls - perfect pearl Mist. Snowflake is die-cut on my Silhouette from the Silhouette library if I am  not mistaken. Merry Christmas greeting is again designed by Mary Powell an SVG file I purchased a few years ago. Thanks for looking.........

Day 1 with Debby

Image
Got to finish another card today that I started last night but then had to redirect my thoughts after my Original Cricut died mid cut whilst cutting my tags for the job. I still had to cut snowflakes and words so spent the afternoon looking through the Silhouette store and my SVG files to find something to play with. Shock horror I even got them to cut alright on the second run.....  Snowflake is from Bird's cards site  : Snowflake number 5 set and the Merry Christmas is from Mary Powell whose website for cut files is no longer active but you can visit her blog here . I bought the file a few years ago and had not used it until now. Funny what you find in your files when you are forced to look elsewhere to cut an item. Thanks for stopping by, Happy Craftin'............

Day 1 duplication..........

Image
Day 1 again with Jennifer showing us how to make a design using multiple word stamps and a few small icons to fill in the gaps and easily stamp several panels at a time. I made up four, two I matted the centre image and two I didn't but personally preferred the extra layer. You just have to be cautious with this design that your stamps are similar in height to stamp together otherwise you get lots of faint markings from the thinner stamps.  Thanks for looking...........

Holiday card workshop Day 1

Image
As I mentioned in my previous post I am taking the Online Card Classes Holiday Card workshop this week. Typical, it is up to Day 3 and I am still working on Day 1 classes which are about easy to duplicate cards if you are a person that likes to choose a design or two and duplicate them for all your cards. This is so not me but I play along with them anyway.  Kristina had us working with a bold stamped image and then using texture paste with a stencil around it. Well, I had no stencil that was going to work in this situation so I pulled out some sequin mesh and randomly added the paste over it. I think the design is a little too close though for my liking to might have to have a rethink if I decide to duplicate it. The other thing I did wrong was not have my distress ink entirely dry when I added the texture paste as the colour has soaked up a little into the paste and instead of being lovely and white it is more of a creamy brown shade which was not what I was going for exactly.

Bo Bunny continued.........

Image
Just a few more Christmas cards with the Bo Bunny free paper pack. It's funny how you become inventive when you get down to the scrappy end of the paper pad.  These first two are inspired by Shari Carroll who layers strips and negative space from die-cuts well. I enjoyed her classes last year when doing the Holiday Card Workshop with Online Card Classes. Am about to start this years class as well so it will be interesting to see what else they have on offer as teachers.  Greeting stamps are from The Stamps of Life and Technique Tuesday sets. Below are a couple of designs from card sketches that I would link to if I could find them again and use greetings from Studio G and Kaisercraft . The Santa is again from the Free Bo Bunny stamp set that came with the magazine. Finally another card with scrap pieces and the poinsettia stamp from Kaisercraft and an old greeting label from my stash from a few years ago.  Thanks for dropping by and Happy Craftin'........

Christmas cards for me.............

Image
A while back I picked up a copy of the Australian Simply Cards magazine - Issue 72 which had with it the Bo Bunny Silver and Gold stamp set and paper stack. When it came to starting my own cards then I pulled it out because it was on my desk and started to play. As I often do with these kind of paper and stamp sets, I take the lead of the designer in the magazine and try their versions out first to get a feel for working with the items. So, the first batch of five cards are my versions of the magazine designs, most of which stayed fairly close to the original design. After that I then went on to my own designs and play adding in the use of some Kaisercraft and Technique Tuesday greetings, German scrap and border stickers. Even the Stampin' Up Merry thinlet got a look in as well as a couple of Cricut die-cuts and small Kaisercraft rub-ons. Feel free to ask if you want any specifics. At first I wasn't too sure about the papers but now I have sett

A card challenge........

Image
At Home and Scrapped during September Heather challenged us to make cards: We all need birthday cards, and usually plenty of them. This month's card challenge is to make at least 3 birthday cards - all different, but using one fairly heavily patterned paper throughout as your main focus. You can team your pp with anything else that you desire to make each card unique and gorgeous. Think layers, banners, strips, die cuts... whatever your heart desires. This got me thinking about the Crate paper page that reminded me of Grandma's curtains - not that I ever knew any of my Grandma's, but I guess you know what I mean. So, I pulled the paper out and challenged myself to use the page and created the three cards at the top - ssshhh... don't tell anyone I was supposed to make three "birthday" cards and they won't notice. Of course I still had scraps sitting on my desk then staring me in the face so just had to use it up to get rid of it and the one

Sad and neglected......

Image
The poor blog does get neglected at times. We bought a dog last month so getting him settled along with school holidays and job hunting has been a busy and not so creative time for me. So, I'm here to share my layouts that I did back in September as I didn't get around to doing any in October. First is the Step-by step challenge designed by Heather Waldron at Home and Scrapped. A pic of my lovely Mum who passed away back in 2006 taken at my niece's wedding with a family member visiting from England. Lots of little bits and pieces from my stash used up on this one. Heather also gave us a sketch to use which I turned on its side and then made another companion page to go with it with the rest of the photos from the day.    The technique challenge for the month was to stamp a background of circles of varying sizes using items from around our home. I found a sellotape centre and noodle cup in my recycling basket and they became the basis of my stampi